
This craft is extremely economical as the main material used is recycled clothing and bedding. Most fabric is suitable, the thicker the better, but keep to the same weight fabric in each rug,
eg. all shirts/bedding or all t shirts.
eg. all shirts/bedding or all t shirts.

The only other material needed
is a piece of hessian for the back cloth

A rag rugger tool is available from Makings Handicrafts

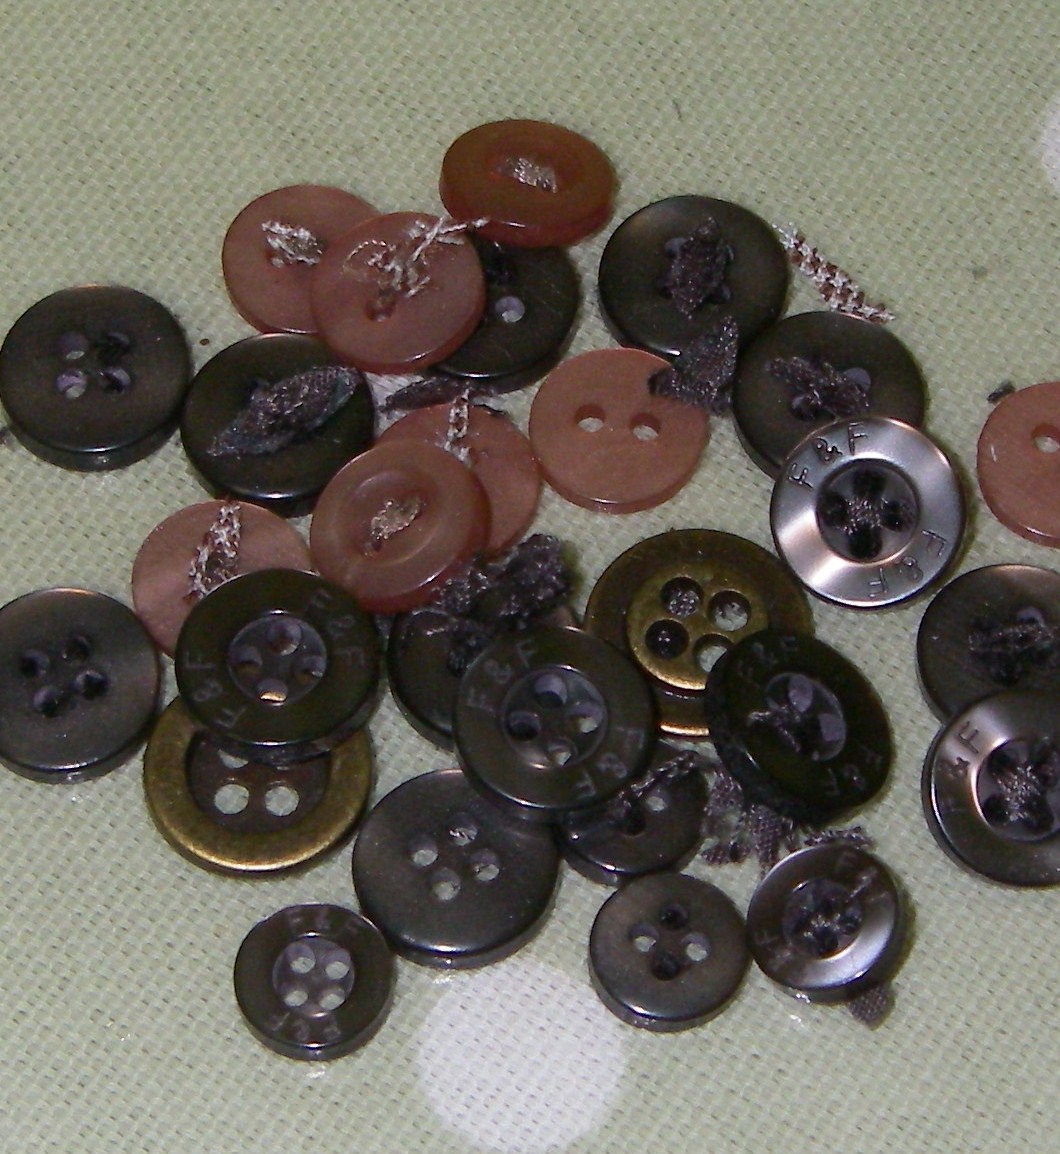
Take a selection of old clothes

cut off the buttons and keep for further crafts
cut off all the seams and hems to leave flat pieces of fabric.
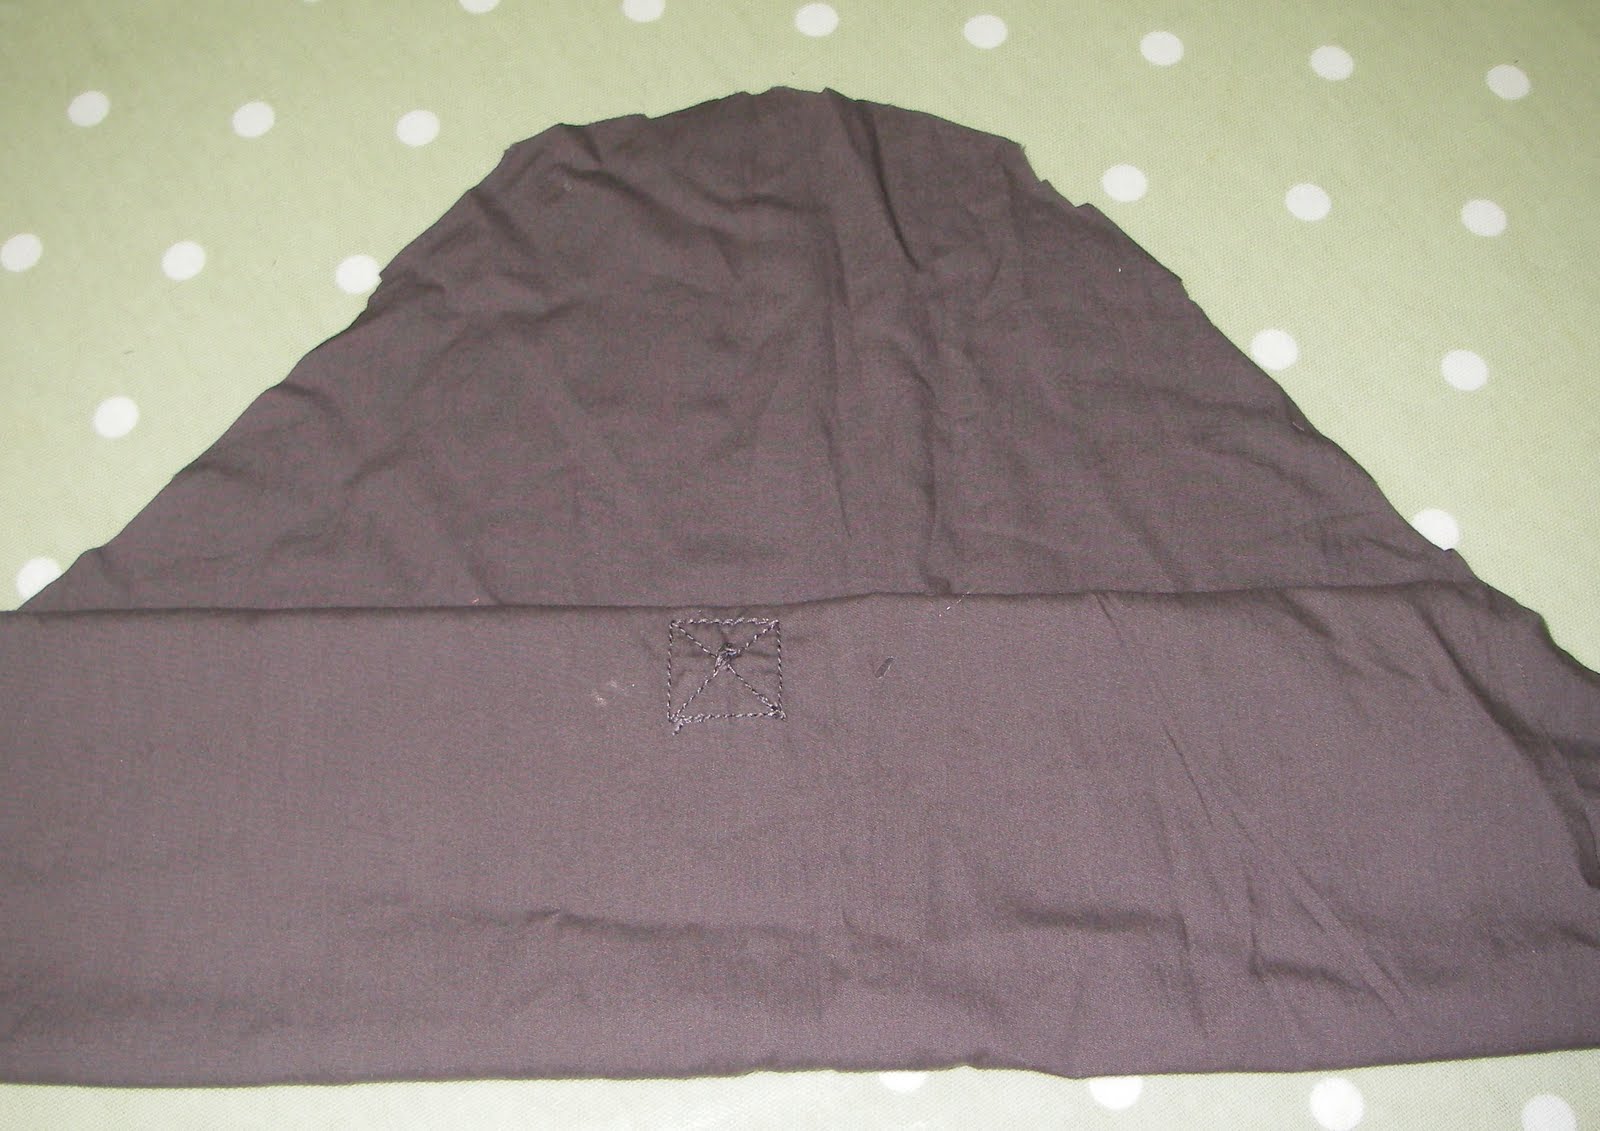
Smooth out the fabric and fold

then cut into strips about 1 inch /2.5cm wide

Next use the handy cutting gauge,
which is a 17.5cm long hardwood dowel
with a deep groove along 1 side

Wrap a long strip of cloth around it like a bandage


and cut through the groove with sharp scissors

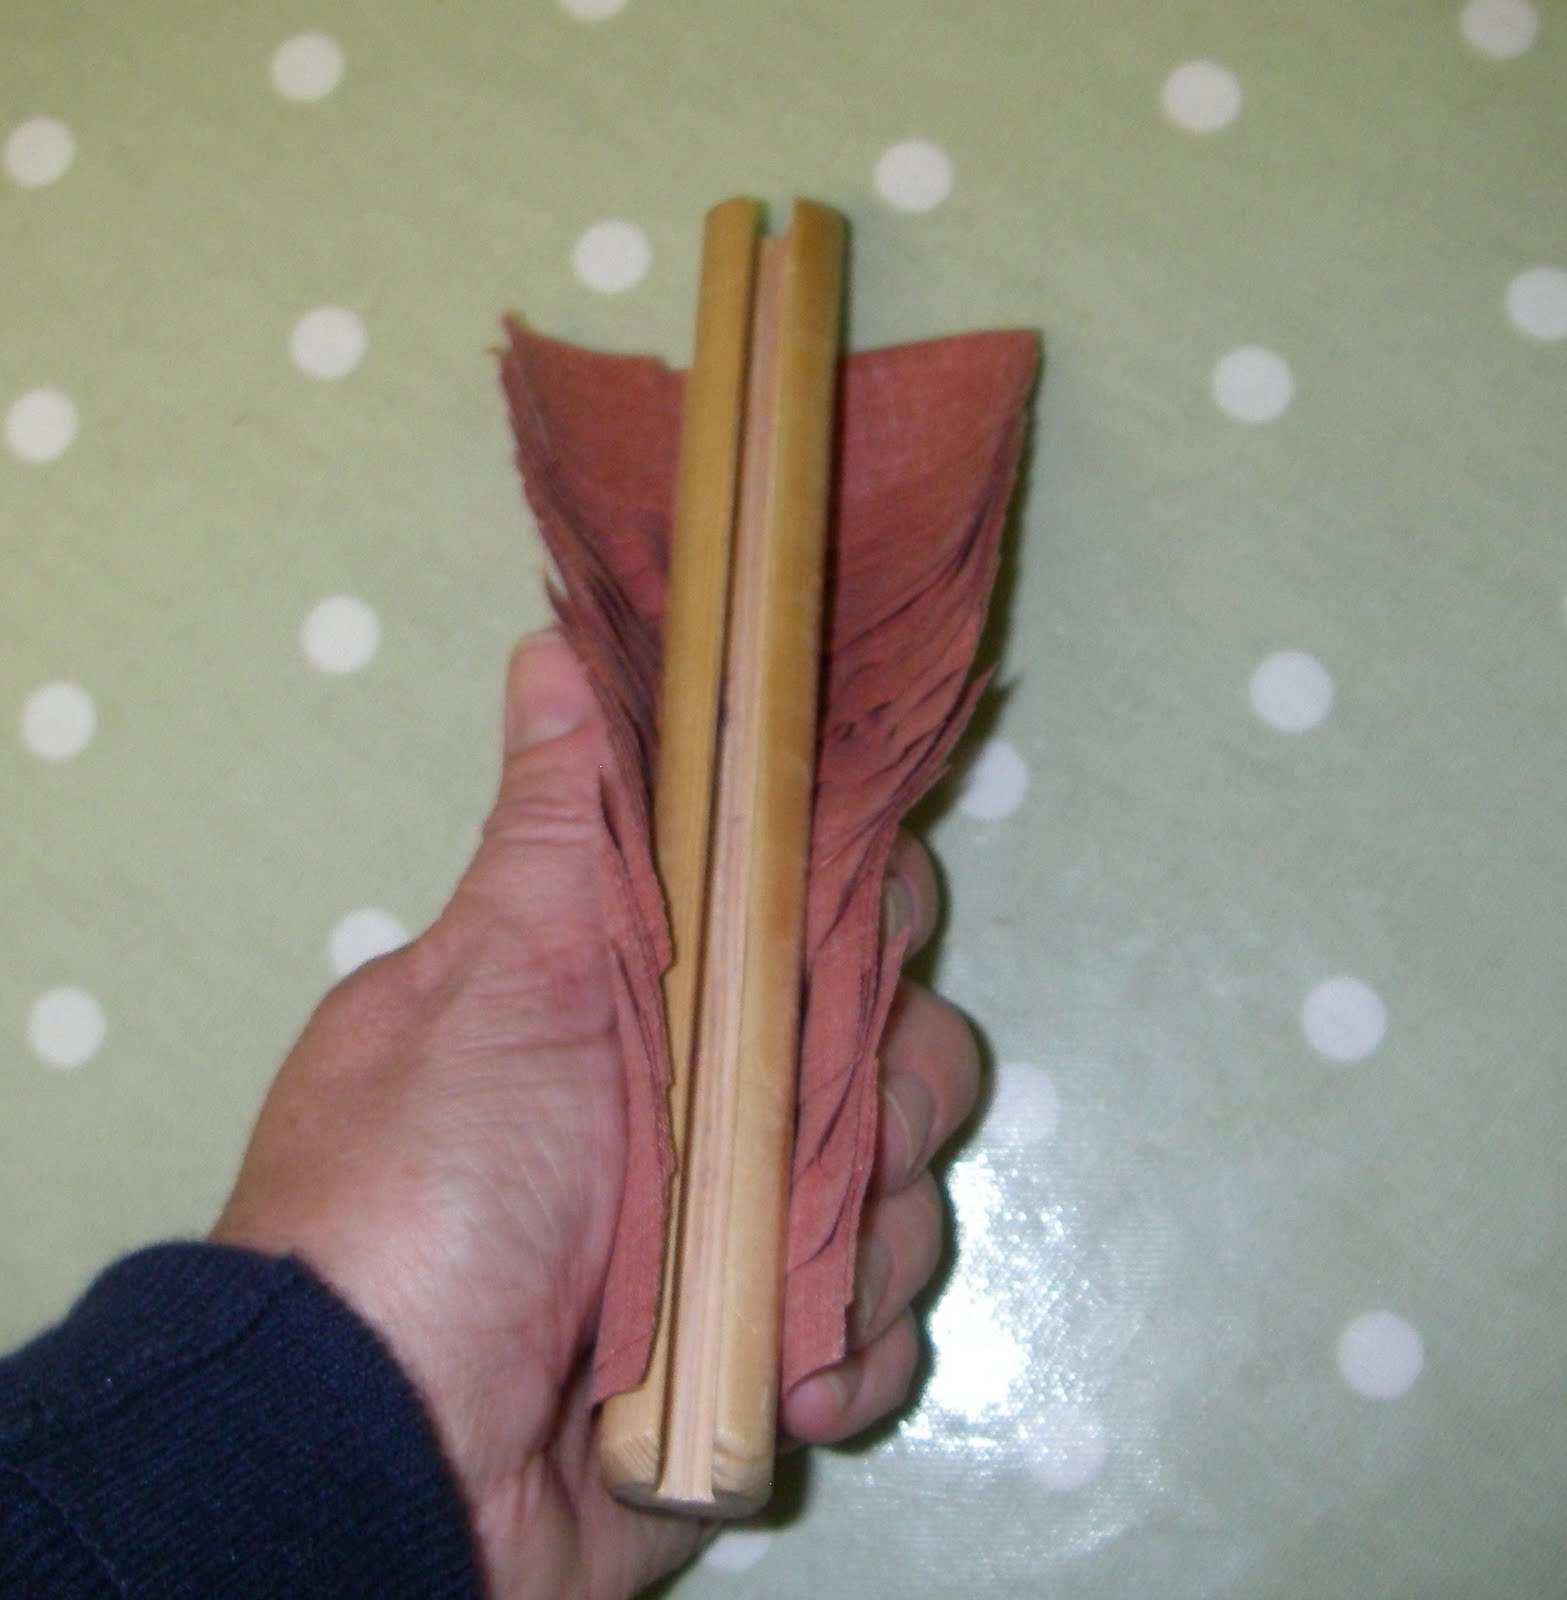
This will reduce it to the lengths required for making the rug


Push the rugger under 2 or 3 strands of hessian as far as it will go


Place 1 end of a rag strip in the rugger jaw

Pull the rugger back until half the rag strip
has passed through the hessian and release.
There is no need to knot the rag

the next strip should be threaded into the hessian
about 4 or 5 strands away in each direction


Make a hem around the edge of the hessian
about 2 inches/5cm wide
using rag strips to hold it in place

Cover the whole of the hessian with strips.

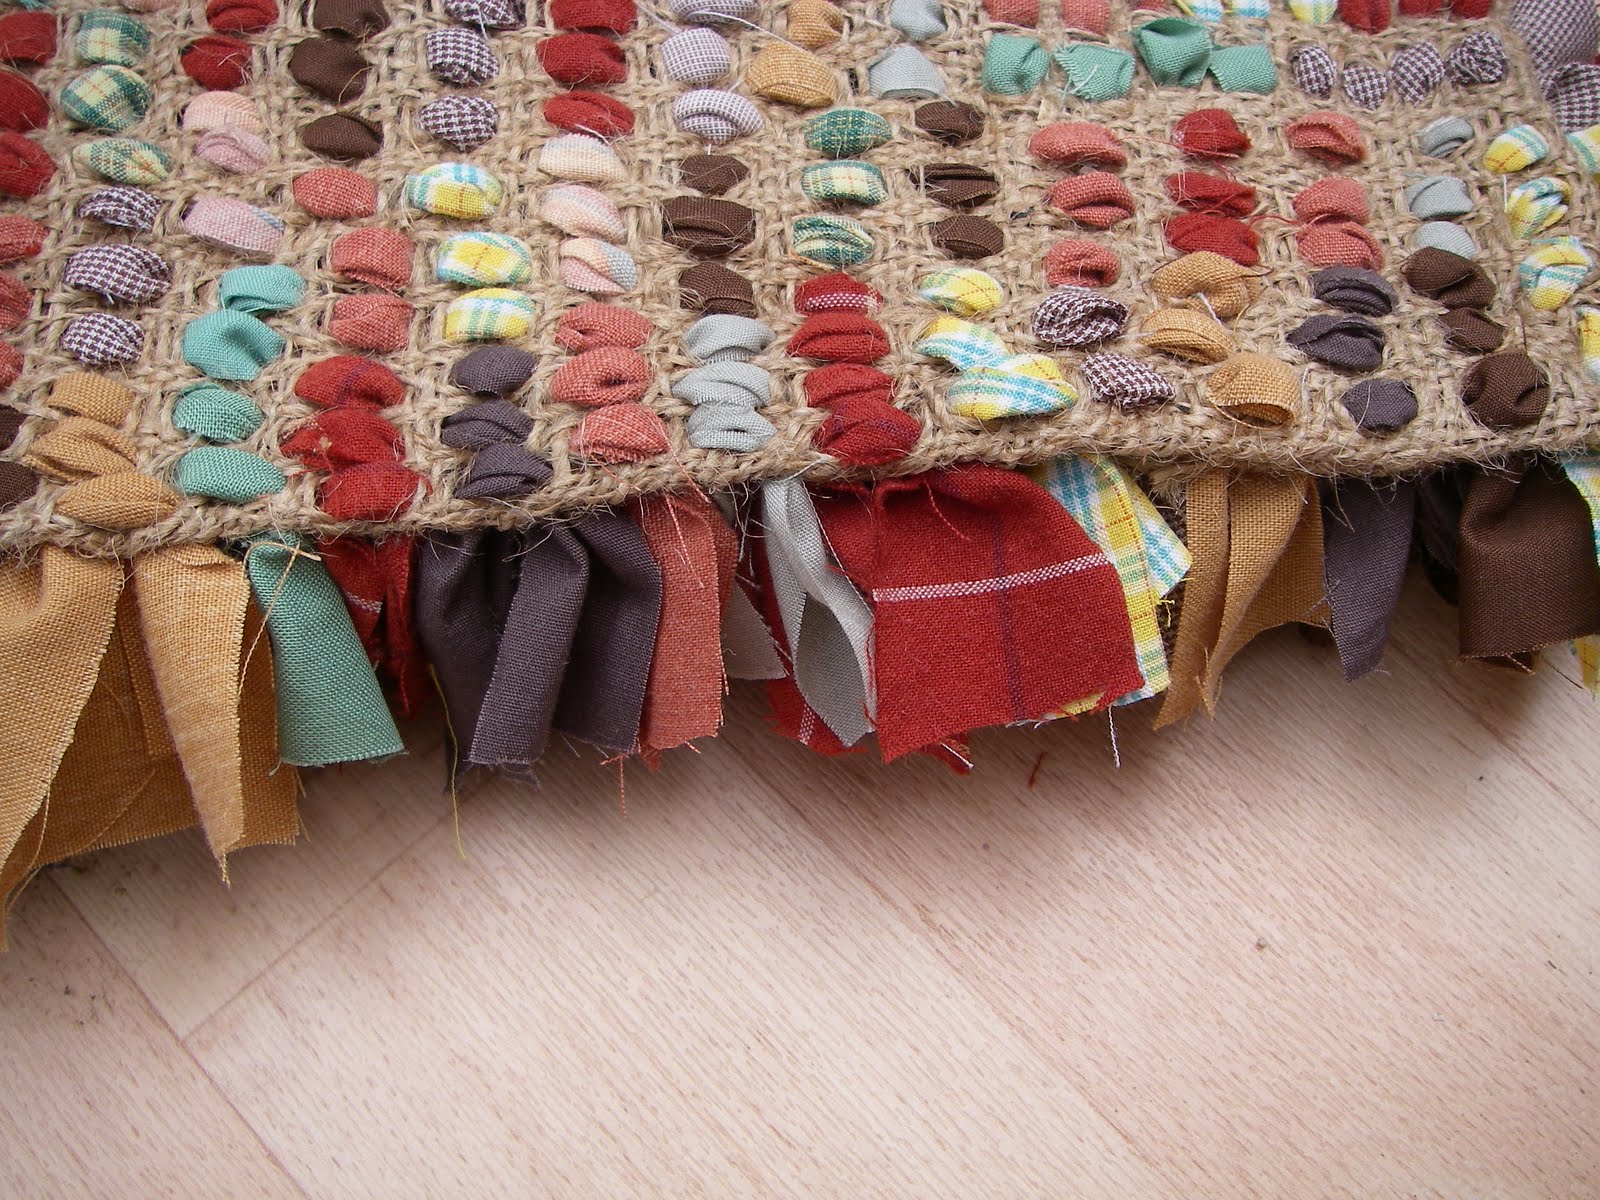
The method of rugging is very flexible,
there is no need to work in straight rows


When the rug is complete give it a good shake
to remove bits and produce an even appearance
DO NOT VACUUM the rug!
Occasionally take out doors and shake to remove dust!

ENJOY :)
Posted by The Patchwork Heart
Thanks Heather!! I'm excited about giving this a try!!
ReplyDeleteHugz,
CJ♥♥
Oh, how pretty - but way too tedious for me - I'd go nuts! I don't even like making granny squares because you have to assemble them, but they sure do look pretty! What a great way to recycle old clothes. I've never heard of this before and I love learning something new!
ReplyDeleteHow wonderful! I started a rag rug last year using a different technique but it was taking far too long so now it's in a box somewhere. Your method looks far easier and quicker.
ReplyDeleteThanks for popping into my blog and saying hello, I love to meet new bloggers. I hope Amanda is doing ok, I do miss her blog.
I'm off now to have look at the rest of this blog and your others.
Take care x
Wow what a fun and easy project.. the results are wonderful.. thank you for sharing your tutorial with us all.
ReplyDeleteM
Heather,
ReplyDeleteCan you recommend an online store where I can to purchase the tools needed for your rug making method?
Thanks!
Hugz,
CJ♥♥
http://www.makings.co.uk/index.php/5/
DeleteThank you so much, this is so helpful. I'll enjoy making a floor rug.
ReplyDeleteBlessings Gail
oh oh I want to do this... looks great fun
ReplyDeletelovely. thank you. hugs
ReplyDeleteVow!!! This is adorable and so beautiful!!! If I ever have too much patches to use in my patchworks, I certainly make this!!!
ReplyDeleteSunny wishes from Crete! Teje
Pretty Nice!! I love your rug ;) Hugs!
ReplyDeleteinteressante complimenti
ReplyDelete멋져요!! 저도 꼭 도전해보고 싶어요~
ReplyDeletewhat is the measurement of the strips if doing by hand? 1 inch /2.5cm wide I dont have a dowel...I love this rug.
ReplyDeleteAdorei a explicação.
ReplyDeleteAdorei a explicação.
ReplyDeleteIf you place the second row in the hole of the first, two ends for every hole, the rug will be firmer and can be vacuumed, no pieces will fall out. More tension in the backing from closer rows keeps it all secure.
ReplyDeleteI'm confused about making it vacuumable. Also making it like the tutorial can t be hand washed and thrown in the dryer?
DeleteI'm really excited to give this a try. It looks so easy when explained with pictures. Thank you
ReplyDeleteI'm really excited to give this a try. It looks so easy when explained with pictures. Thank you
ReplyDeleteI'm into my 3rd rug, after making one or two errors in the first two, I seem to have got the technique for drawing in and tapering off the different colours in this one. Started as a winter hobby, now have orders from the family for 6 rugs of various sizes. I love doing it, it's very theraputic.
ReplyDeleteCan this rug go in the washing machine?
ReplyDelete